
For my big diamond, Katherine, and little diamond, Amber, I had searched for hours on Pinterest to find the perfect Christmas present for them. I wanted to craft them something personal to show all the memories we had shared together. I had finally found the perfect gift for them, bejeweled photo collage letters!

Christmas is right around the corner, but you still have time to make these! You can complete a letter in a matter of a day.
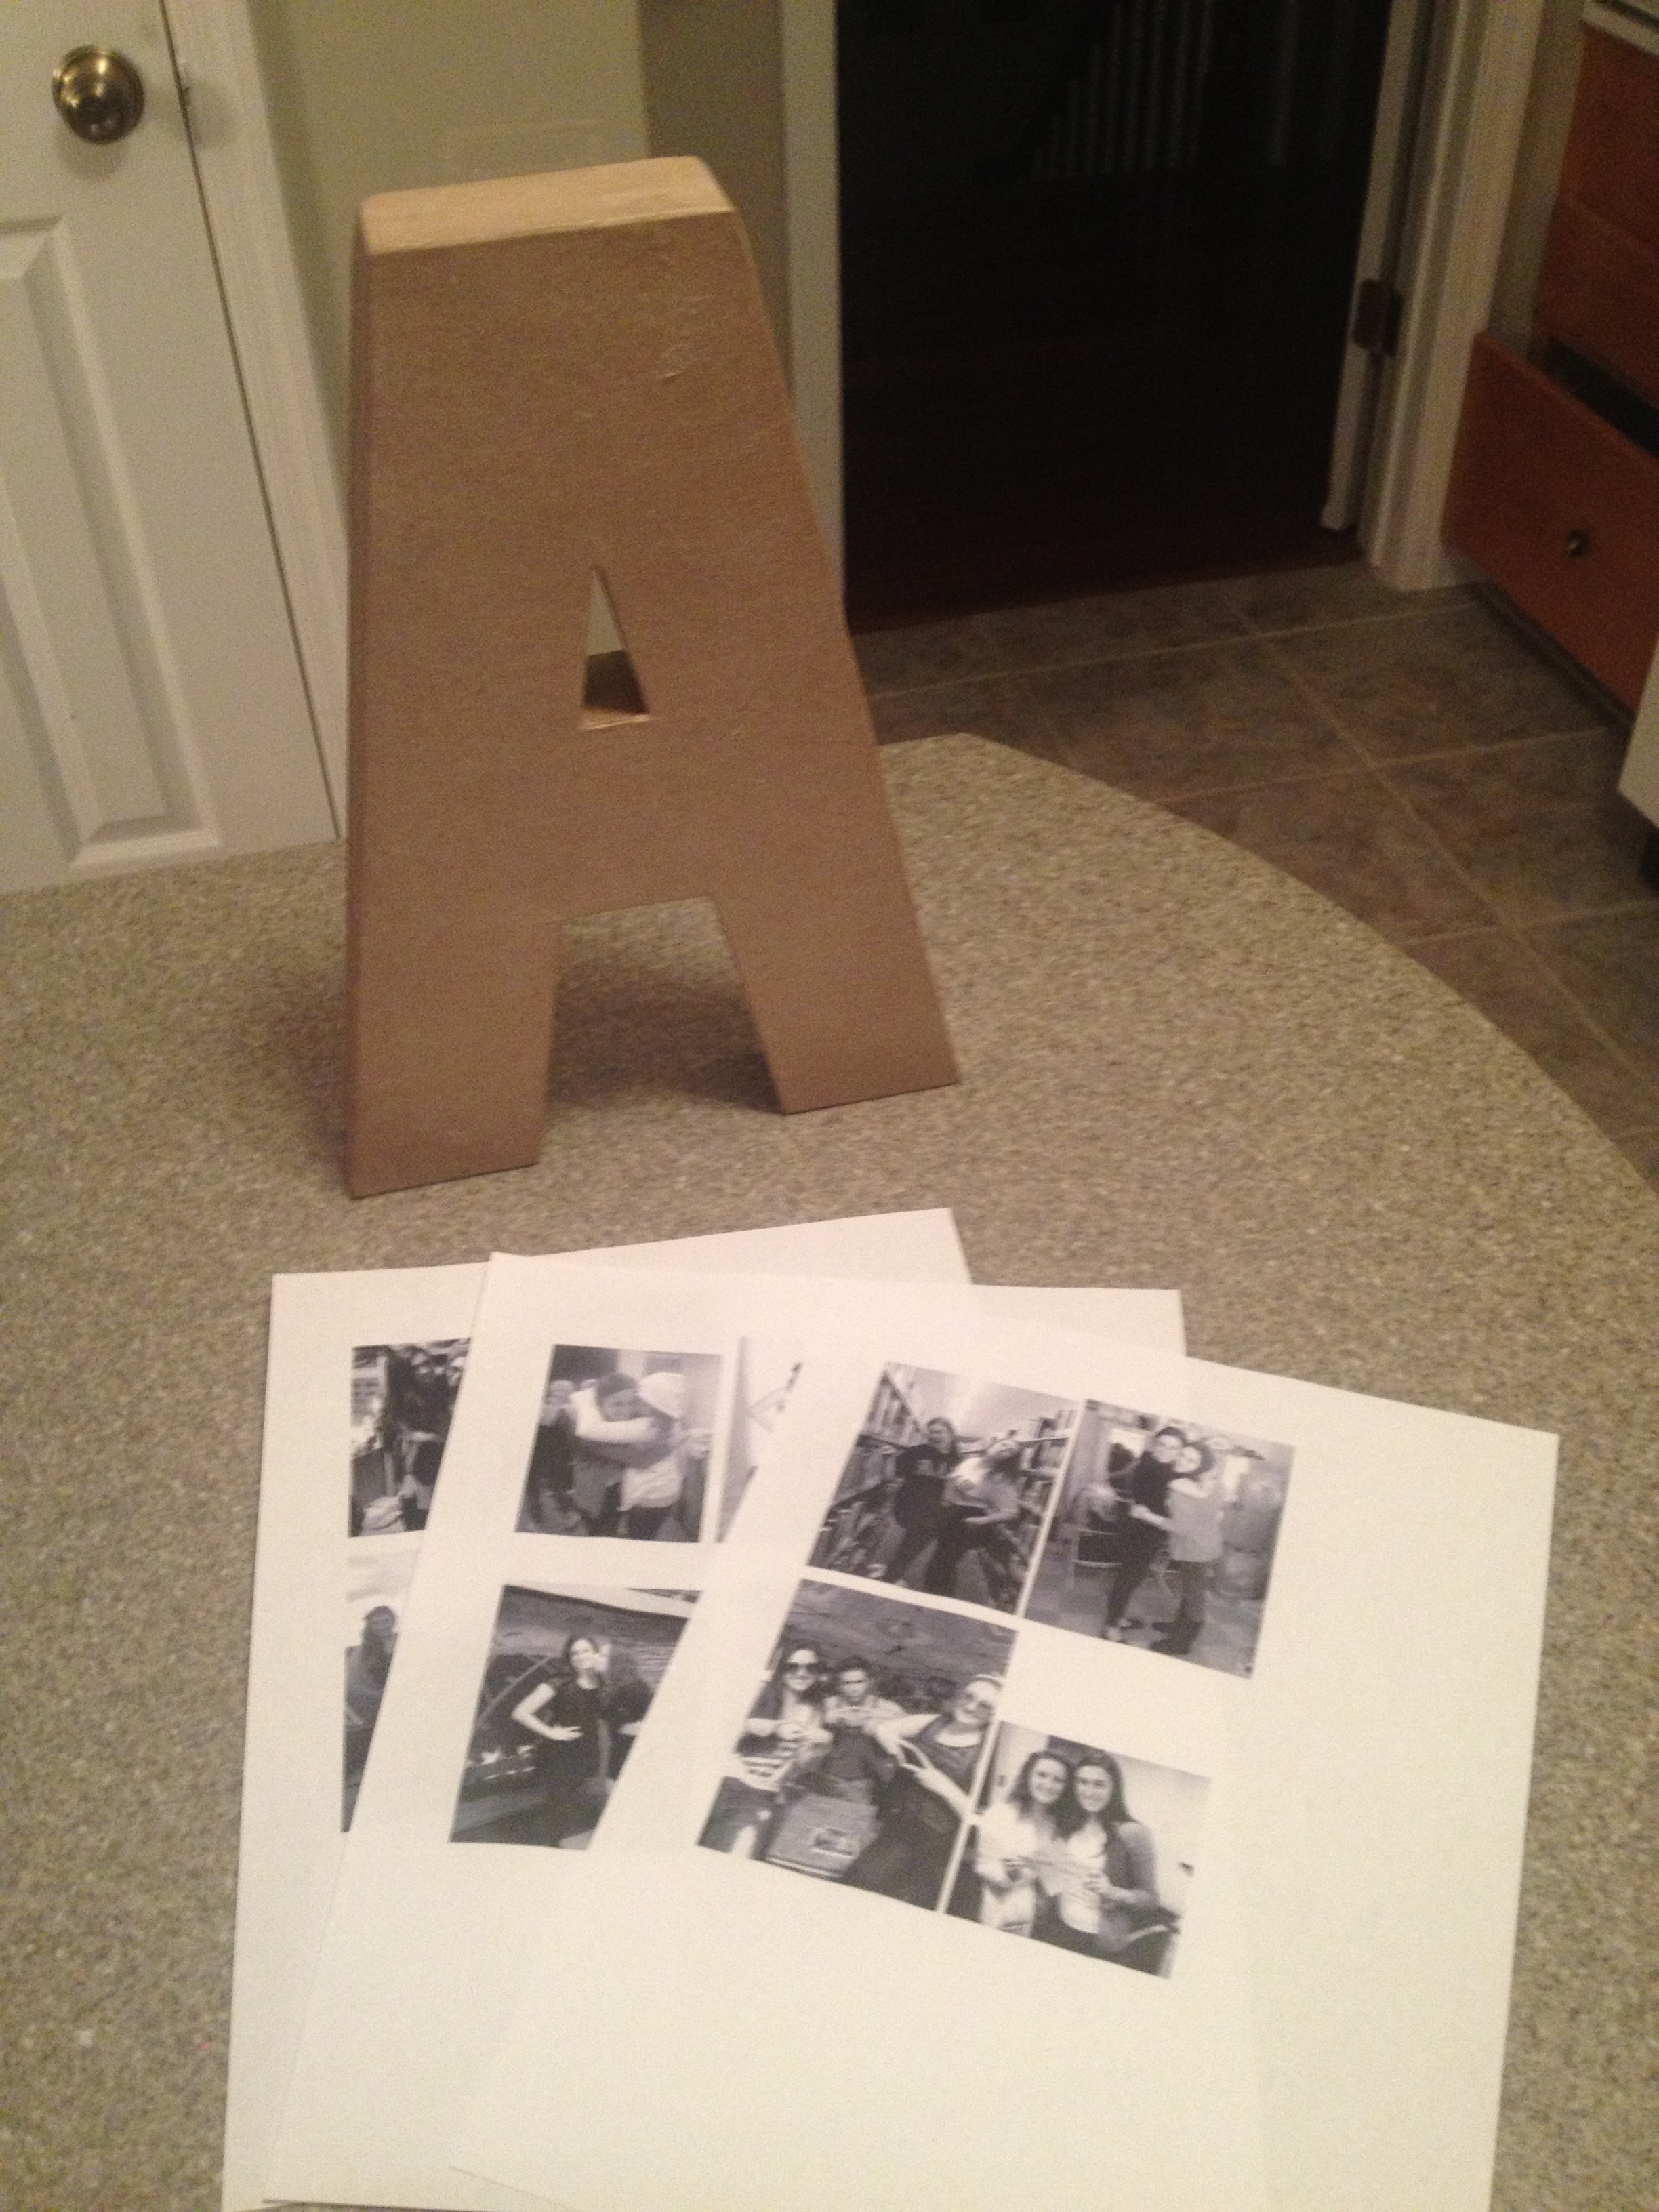
First, you need to prepare to do the craft. I went to my local Jo-Ann craft store and got a cardboard letter. I then printed out pictures, right from my computer, of my favorite black and white photos of me and the gift’s recipient.
I didn’t want the letter to just be plain cardboard, so I used white acrylic paint to paint it.

The paint was super quick to dry. Make sure to paint every side!

I’ll be honest with you, readers, I am a perfectionist. So instead of just gluing the photos down with mod podge, I laid out the photos on the letter. I pieced everything together like a little puzzle to see how it would all fit.

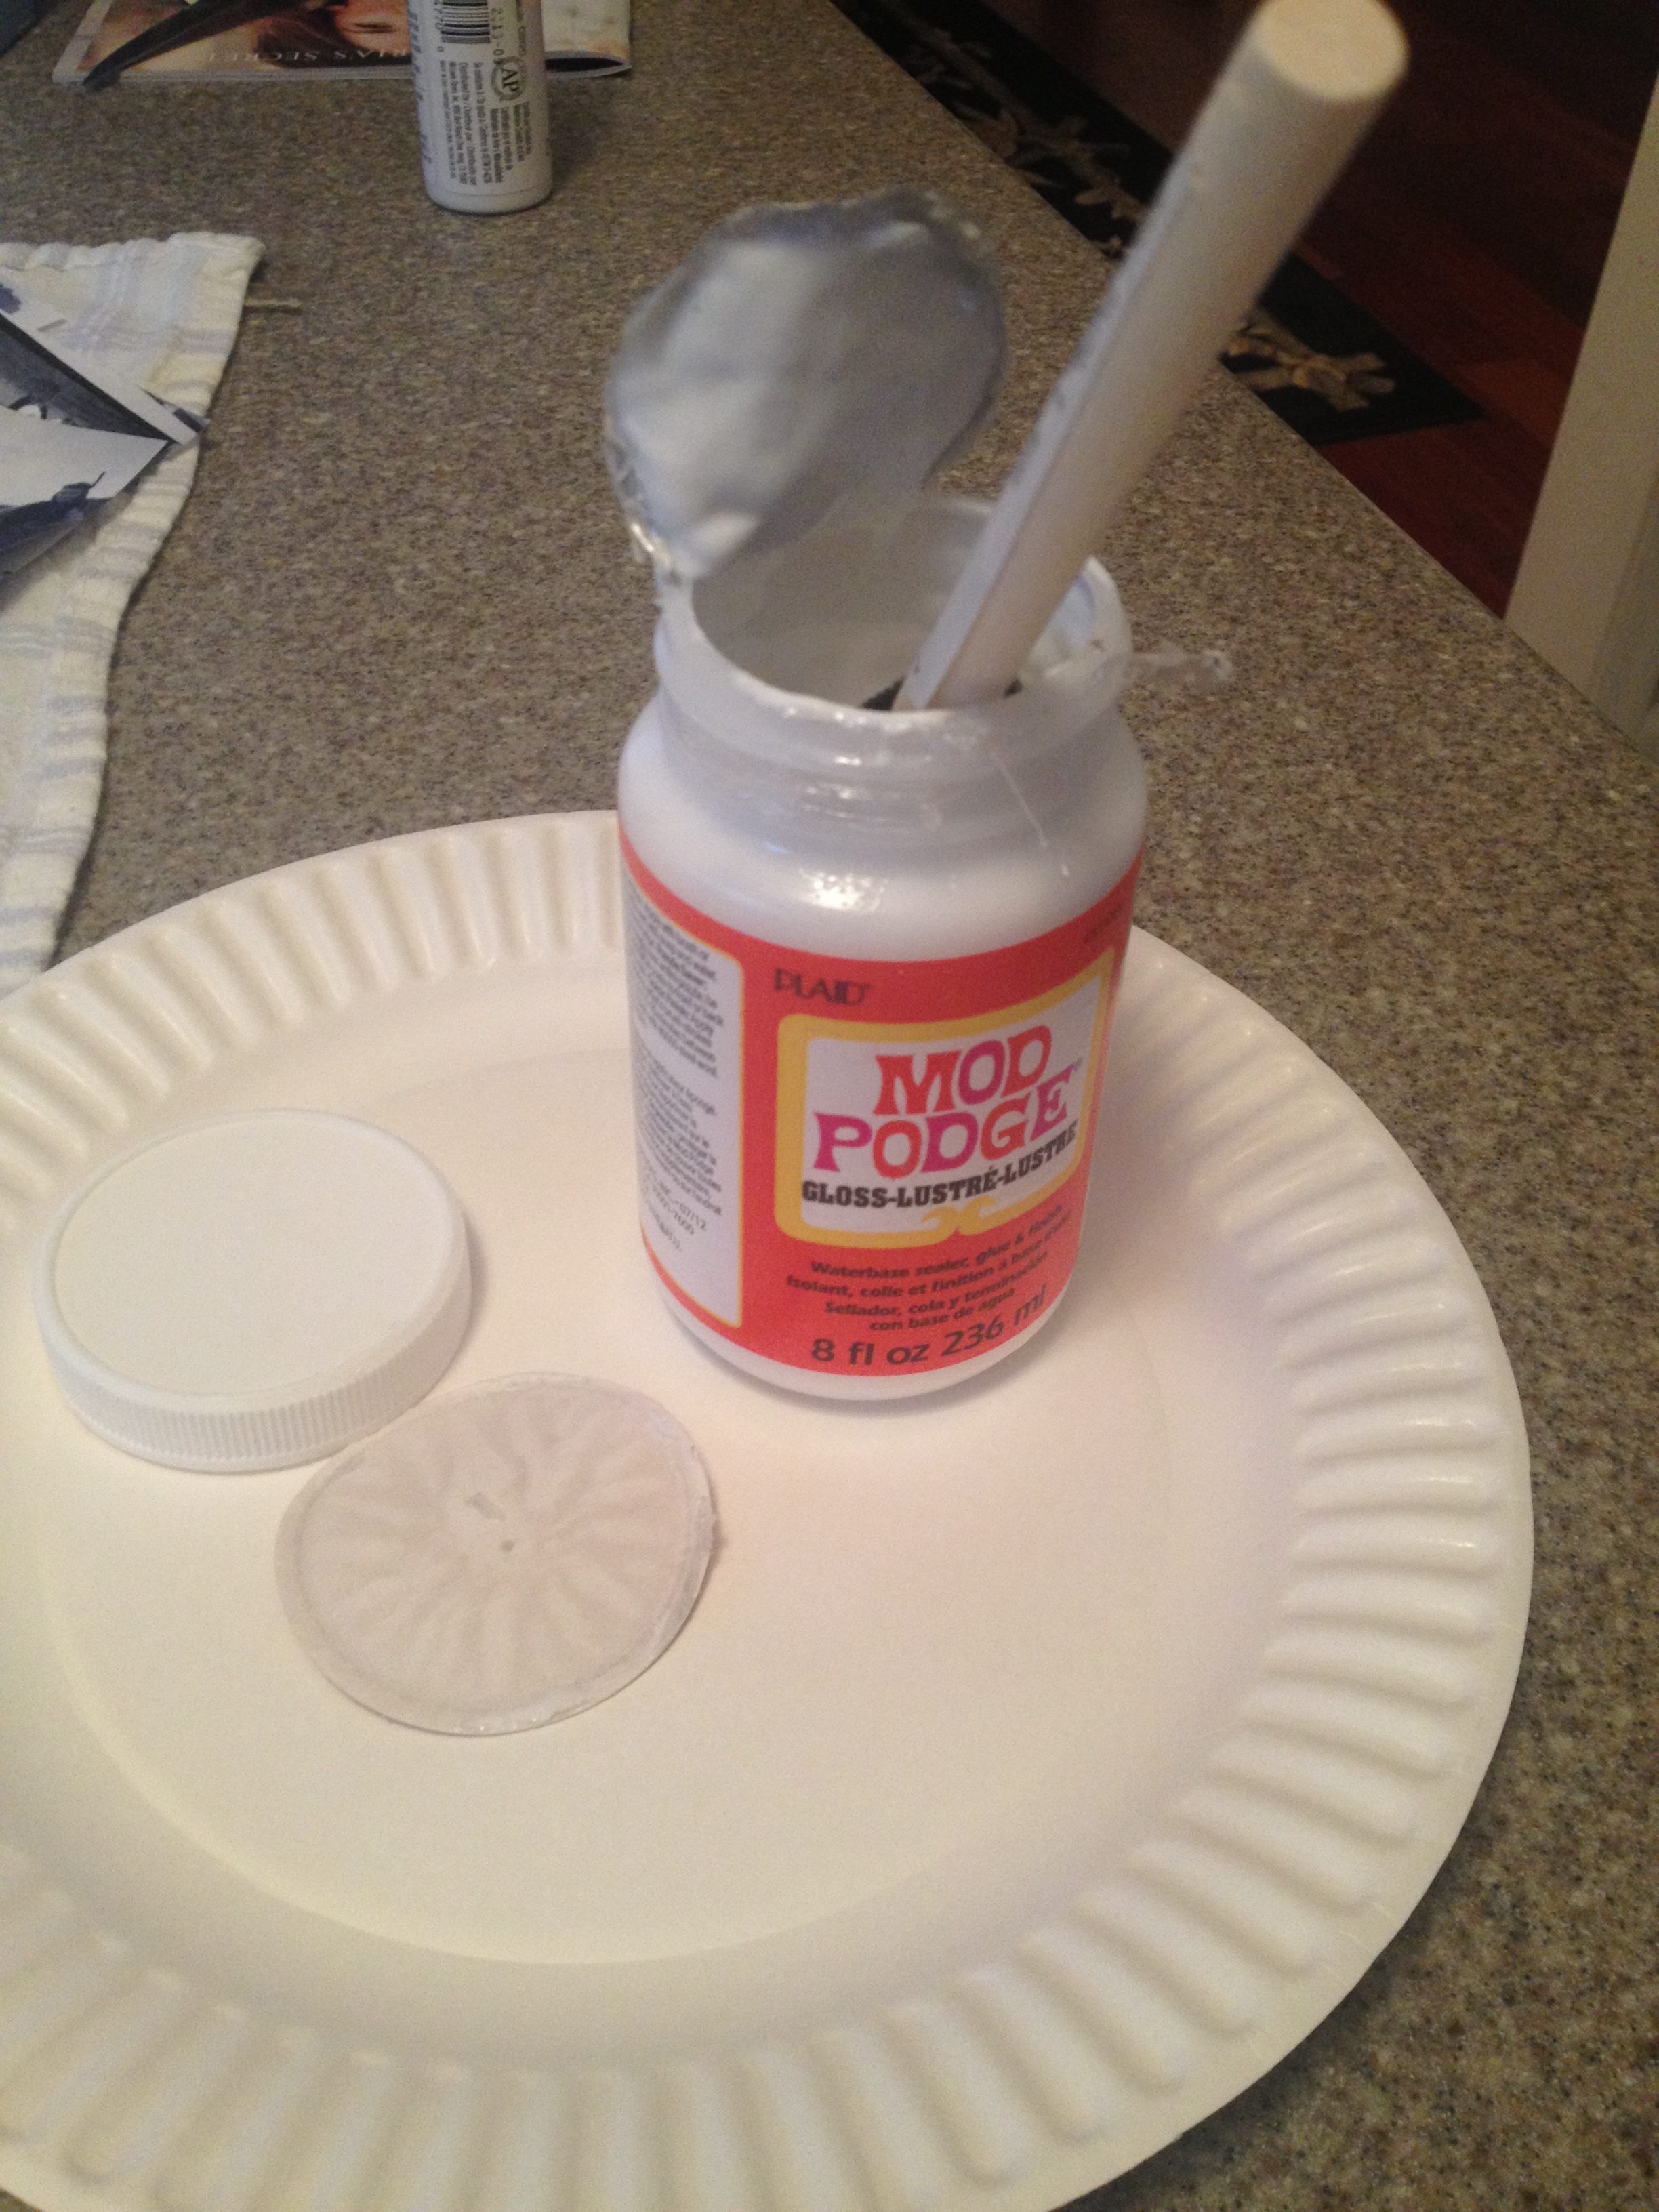
Once everything was how I wanted it to be, I took a picture to remember. I then took the photos off the letter and began to glue it down! To do so, you need a sponge brush and mod podge. Both can be purchased at a local craft store. I bought mine at Michael’s.
To glue the photos down, I would first use the sponge brush to put glue down on the letter. I would then stick the photo onto it, trying to avoid allowing air bubbles pop up. Once the photo is on, I put the mod podge over it. The mod podge was put on top of the photo for a glossy feel.
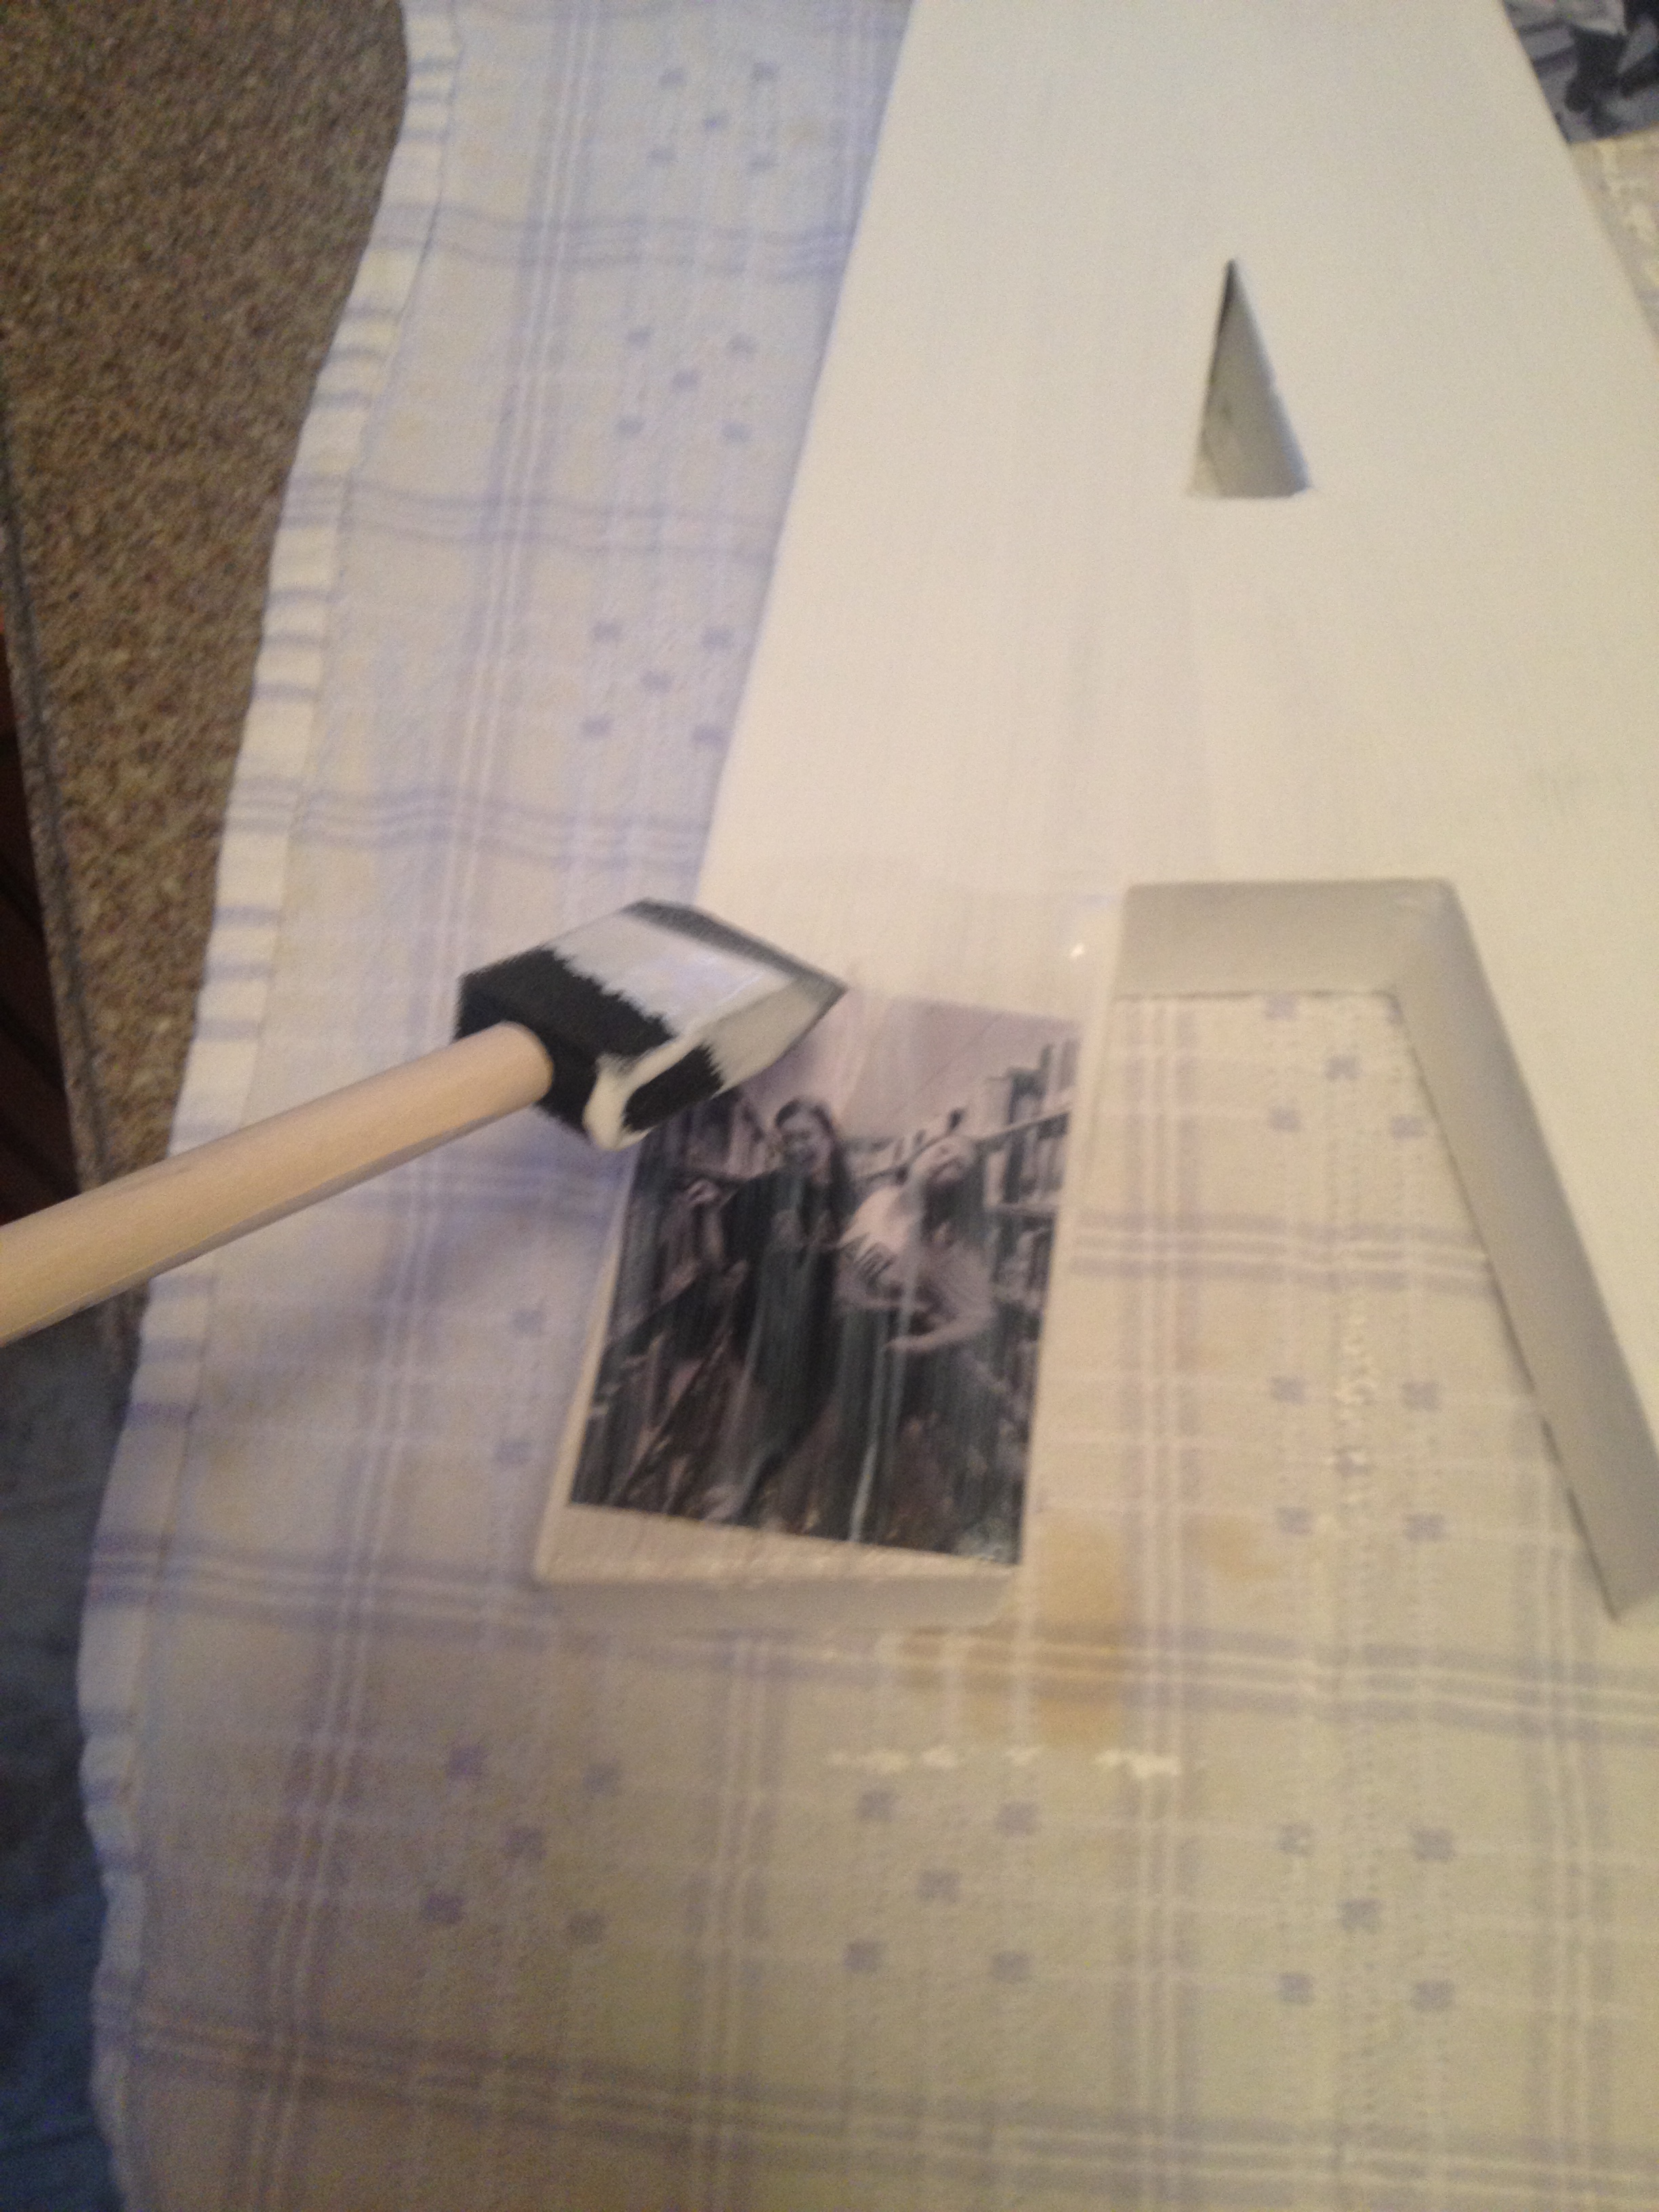
Continue on by gluing down each photo with mod podge and put the mod podge on top of the photo, as well.

Once you have every photo glued down, run one last layer of mod podge over the entire thing. Make sure it is all even.

If you can see the white glue on the photo, it’s okay. That’s what makes the photo appear to have a glossy finish once it dries.

Before doing anything else, you need to let the mod podge dry!

You can always leave the letter just like this, but I decided to bejewel the letter with adhesive jewel stickers.
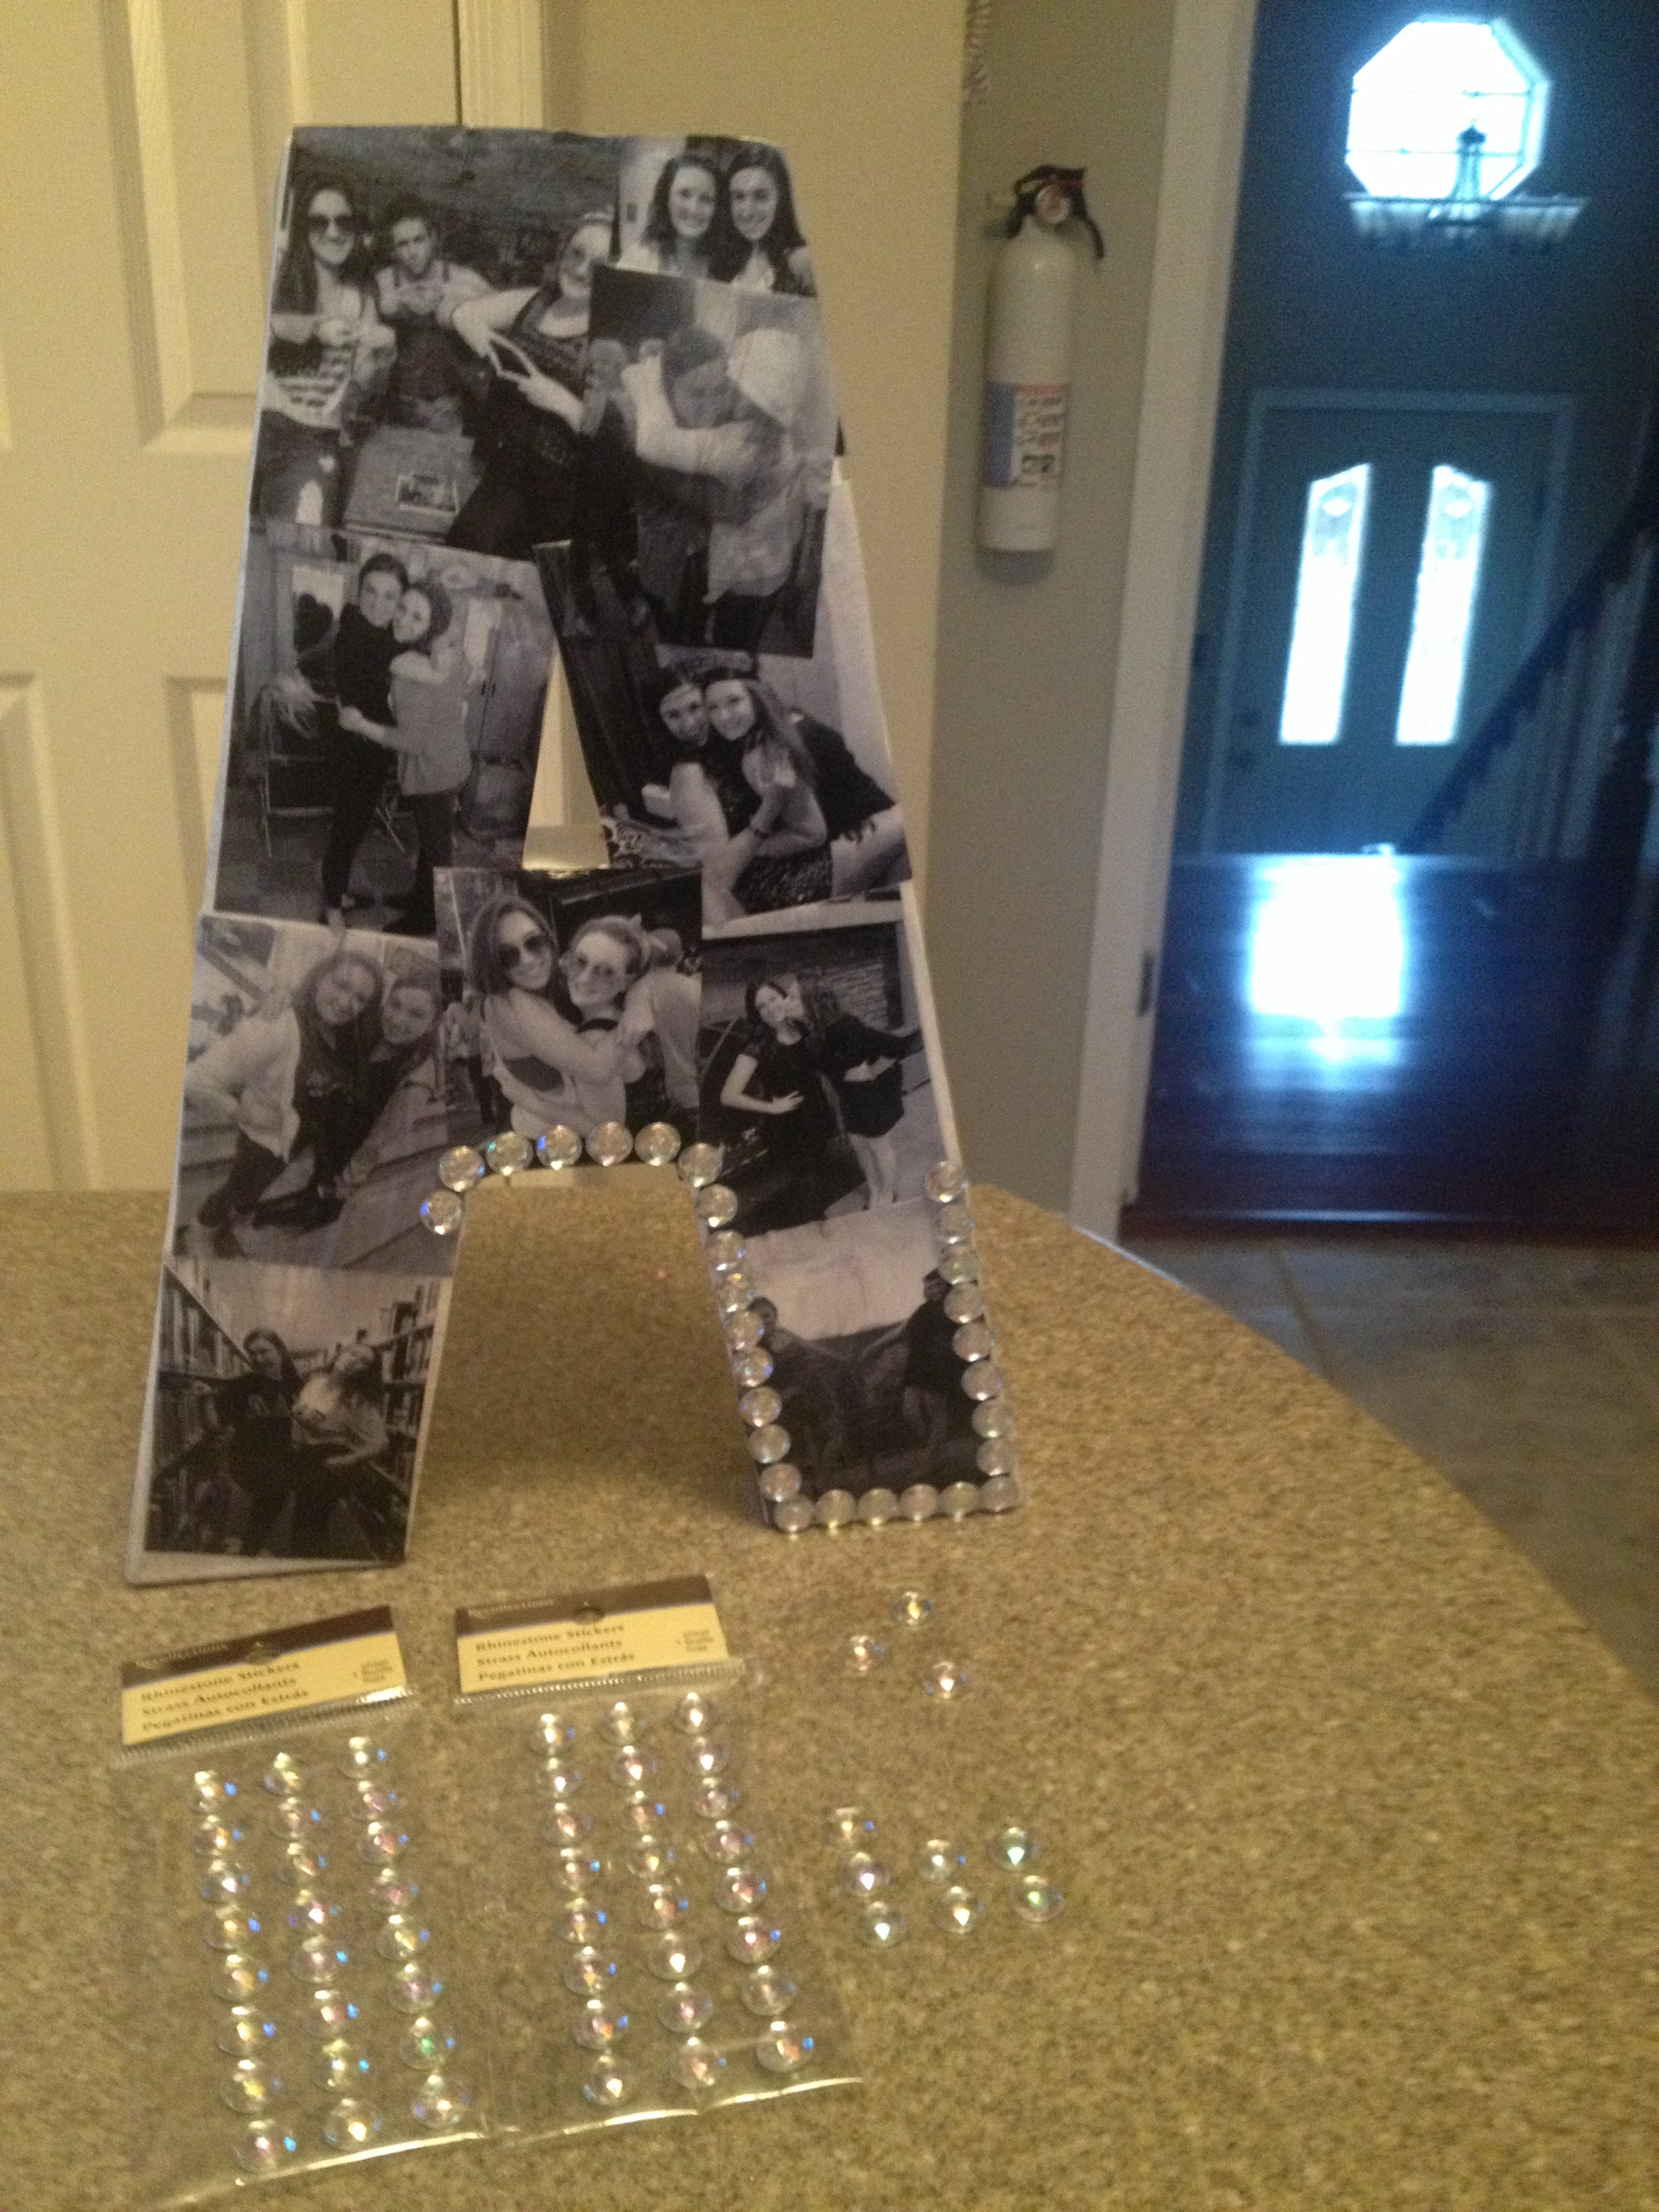
Once you finish adding the jewels onto the letter, it’s all done!
 Amber and Katherine loved them. I am so happy with how they came out!
If you decide to make these bejeweled photo collage letters, drop me a message in the comments below and me know!
And remember to check out the site The Collegiate Standard for sorority and fraternity jewelry! PLUS use coupon code SAMI10 to receive 10% off! A post on their products will be coming soon!!

Super cute gift idea! I am going to have to make some for my friends!!
xoxo,
Brie
My big and little absolutely loved them! Plus, they’re super easy to make!
Good luck with them and happy holidays!
XO,
Sami
What size did you print the pictures?
I used Instagram size photos – if that is of any help. I printed them right from my computer!
XO,
Sami
Did you use photo paper? Or just ordinary. Also would pva glue do the same as the your glue?
These are fab
Hi Lynsday,
How did the craft go? I hope it turned out well!
I used normal printer paper. I don’t know if PVA glue would be the same. If you do end up using it, please let me know!
XO,
Sami
PS. I would love to see pictures of your finished product. Shoot them on over to sparkleandshinesami@gmail.com! 🙂
Absolutely love these! Just ordered my materials for my daughter to make one for her new decorated room 😜
These are really neat! I love the idea and am going to share it with my 16 year old daughter! She will be so in to this! Thanks so much for posting on our All Things Christmas Link Party! Trisha
Hi Trisha,
Thanks for checking the letters out! My big and little absolutely loved them. Your daughter’s friends will love them, too! As a mom’s perspective, my mom enjoyed them too because it wasn’t a super messy craft.
Enjoy your holiday season!
XO,
Sami
Hey Sami: Guess what?! You’ve been featured on our All Things Christmas Link Party!!!! Yay! Congratulations! Can’t wait to see what you do for this week! Trisha Merry Christmas!
Thank you so much, Trisha! That is such an honor!
Have a great Christmas!
XO,
Sami
Pingback: All Things Christmas Link Party {Week 5} - Little Miss Celebration
Pingback: ALL THINGS CHRISTMAS LINKY PARTY
Pingback: All Things Christmas Linkup Party #5 - creative geekery
I want to do this so badly. It is too cute!
Thanks, Emma!
It really is super easy to make, I recommend doing it for sure!
XO,
Sami
super cute idea but I’m wondering if when you printed the photos out,
did you use photo paper or regular paper..thanks!
Blessings!
Erica
Thanks, Erica!
I used regular computer paper!
If you do the project, let me know how it turns out!
XO,
Sami
I want to do this for my little girl’s best friend. I printed my pictures off at Wal-Mart. I didn’t realize they were on regular paper. Will actual pictures on photo paper work, too?
I think you just saved my life!!!! I’m on a crazy tight budget this year but still wanted to do something awesome for my friends and sisters for Christmas to show them how much I appreciate them and this is IDEAL. It is so cool, elegant, and personal and can be tailored to each lady specifically so it’s the perfect gift. Plus, it’s something they can enjoy all year long whereas some gifts are really only relevant for a little while. I love this gift. I am so glad I saw your pin. Thanks for sharing!!!!
Love this idea! What size pictures did you print out to fit?
Hi love this concept and want to do
it for my daughters 1st birthday. Please let me know what size of alphabet letter do you get from Jo-Ann and what size photos would you recommend to fit.
Thank you,
Princy
Did you photo paper or did you print the photos just on regular copy paper?
Thanks
I used regular printer paper!
XOXO,
Sami
I loved this idea and I want to do it for my grandson, minus the jewels of course! 🙂 Haven’t decided what trim I will use, but the idea is fantastic.
Omg, LOVE! I just figured out what I am doing for my bestfriends birthday next month!
Pingback: DIY #139
What siZe pictures do I order for this awesome idea!!
Hi Jody,
I’m glad to see that you like this post! You do not need to order pictures – just simply print them out from your computer!
Also, they are about 3 by 5 size, or the size an image appears on Instagram!
Good luck – happy crafting!
XO,
Sami
Do you use computer paper or a thicker paper for the pictures?
Hi! So a few questions:
I saw that you used white to paint your letters, what about a pink or purple? Would that come through the photos too much?
And also, did you use white glue to put the photos on the letter or just mod podge?
Thanks!
what size letter did you use
Do you have to use modge podge?
Pingback: Photo Collage On Letter | Wallpapers
Can you still get the cardboard letters from Jo Ann? And where did you get the stickers from?
Yes, you can still get the letters. I also got the stickers from Jo Ann’s.
Best of luck & happy crafting!
XO,
Sami
I think this is really cute and unique. I would like to do this for my best friend birthday. I need some ideas because I want to use more pictures and letters. Should I use her initials or B.F.F ?
hi, it’s a great idea, loved it 🙂 but i have a question, you print out your pictures on paper what if I print out my pictures not on my paper (regular pics) is this going to work the same?
Pingback: 22 Easy Teen Room Decor Ideas for Girls DIYReady.com | Easy DIY Crafts, Fun Projects, & DIY Craft Ideas For Kids & Adults
Super cool idea I’m going to do it! Where did you get the letter A? My friends name starts with an A!
What was the size of the letter that you used?
Shout out to this craft blog on our YouTube channel!! https://www.youtube.com/watch?v=Ia0FNgcfE9E
Hi! Where did u get the adhesive jewel stickers!? I can’t find them anywhere but I think they make the letters so I definitely want to get some!! If you could let me know where you got yours I would REALLY appreciate it!!
Hi Tatum,
I got the jewels from Michaels! It’s my go-to place for all crafting needs. If you can’t find them there, try JoAnn’s!
XOXO,
Sami
Pingback: Easy and Budget Friendly DIY Gifts - Noted List
I have a question does the pictures ever fade or peel after awhile?
What size letter did you use????
Pingback: Sami’s Holiday Gift Guide: An On Location Tour | Sparkle and Shine
Hi! I love this! Could I hire you to make one for my BFF who is turning 50????? I am so not crafty! If so, please let me know your price. I could email you photos. Thanks! -xo Annie
Hi,
Were your pictures like paper or like the real feeling of a picture? Cause my printer does both
Hi Sami
I love this idea and have been looking on line for the letters but they all seem really small. Where did you get your letters from?
Thanks
Tracey
Hi Tracey,
I purchased my letters from JoAnne’s Fabrics.
XO,
Sami
My daughter and I are doing this for a gift right now. Can’t wait to see how it turns out!
AWESOME Idea! I am hosting a small family (my immediate family and our kids and grandkids) reunion this August and there are gonna be teenaged girls!! I’m gonna have some photos already printed for them (pre-emailed from their parents) and have all of the supplies (Initial’s included) so that they can make their own! …It’ll be a great way for them to bond since they live in different states! In fact…I wonder if all of the “girls” would enjoy doing this craft? We range in age from 70 down, but most of us are in our 50’s. Sounds like fun to me!
Pingback: DIY Room Decor | How to Decorate Wood Letters | Kids Crafts | Craft Idea
Pingback: Easy and Budget Friendly DIY Gifts - IdeaStand
Pingback: Get ready for the holidays with Sparkle and Shine & my ULTIMATE gift guide | Sparkle and Shine
Pingback: 22 Easy Teen Room Decor Ideas for Girls DIY Projects Do It Yourself Projects and Crafts
Pingback: 30 Easy and Budget Friendly DIY Gifts
I will be taking on this beautiful craft today!! I hope and pray that all goes well. I love the ones you created!! I can’t wait to see how it turns out!!! Thanks for sharing, Sami!!!
Hope the crafting went well! If posting on Instagram, would love if you could tag me at @SparkleShineSami so I could see.
XO,
Sami
Pingback: 23 Cute Teen Room Decor Ideas for Girls - Homelovr
Pingback: 20+Beautiful Teen Room Decor Ideas for Girls